Current Entity: Web-GAAP Training School District - 2006

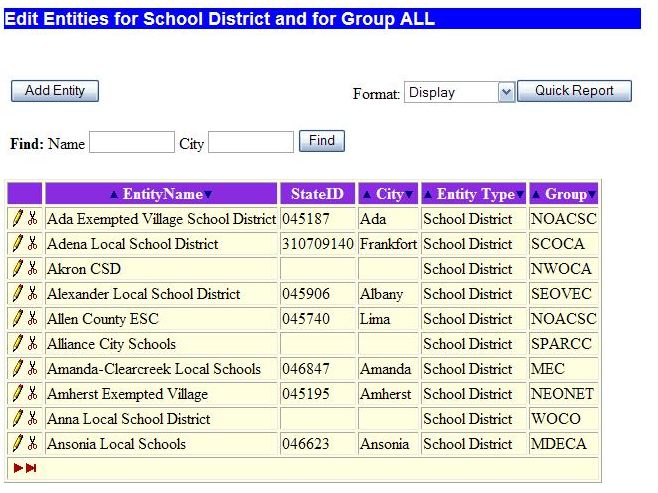
- Add Entity button adds an entity to the Web-GAAP system.
- Quick Report option allows you to generate a report of all entities currently a part of the Web-GAAP system.
- Find option allows you to find a particular entity by entity name or by city. Simply enter the information and click the find button.
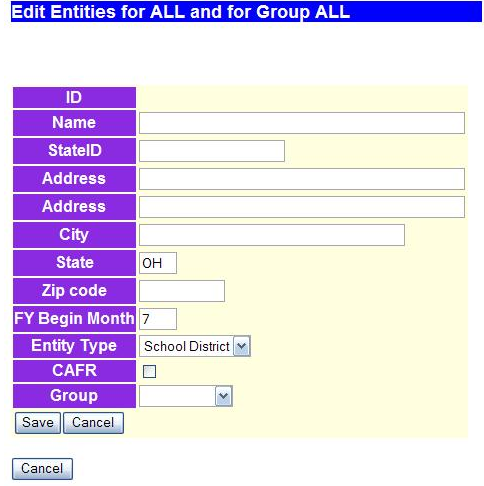
From there you will see the following screen:

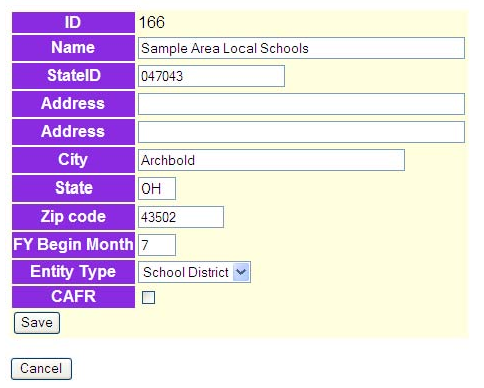
You'll enter the following required information for the entity:
- Name
- StateID the school districts IRN. This only applies to school districts. At this point you can also add any other known information.
NOTE - Duplicate stateID's will be prohibited. If you receive an error about entering a duplicate stateID, contact the Web-GAAP team. It may mean that the district already has a Web-GAAP account with another ITC.
- FY Begin Month for school districts will be "7" for July.
- Entity Type Select from the drop down box.
- CAFR check the box if they are reporting this. For schools this flag is used by the program that translates USAS accounts to GAAP accounts. If this flag is on governmental fund expenditure accounts translate at the two digit function for non-instructional services, extracurricular activities, and capital outlay rather than the single digit function if the flag is off.
- Save click button to add this new entity to the Web-GAAP system.
- Cancel click button if you do not want to add this entity to the system. You will be returned to the Maintain Entities screen.
Here is an example of a school:
Once you successfully add the entity you'll be taken back to the Maintain Entities entity selection page (see image #1 above). From here you can select the newly added entity by clicking on the pencil icon. If this is the entity's initial year on Web-GAAP you will need to create the entity's First Fiscal Year on Web-GAAP before granting users access.
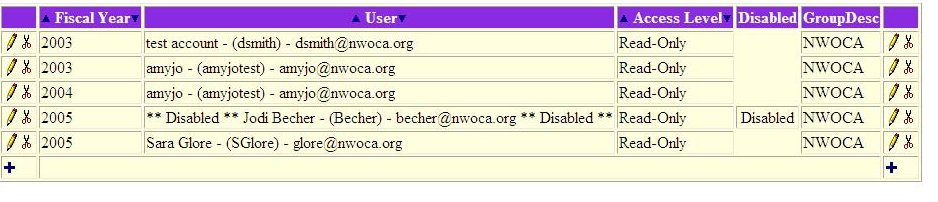
A second grid will appear below the entity information:
This is where you can assign users to that entity. These users are assigned to your ITC or "group".
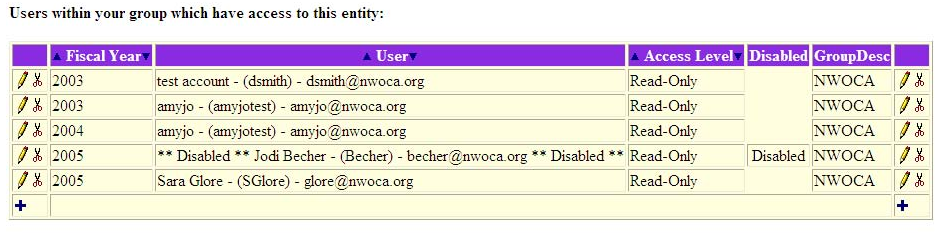
- Fiscal Year drop down box that lists fiscal years available for that school.
- User drop down box that lists users within your group/ITC.
- Access Level drop down box of options Read-only(default) or Update access.
- Disabled if user is disabled the word 'Disabled' will be displayed here.
- Group Desc shows what Group user is assigned to.
NOTE - If a user account has been disabled it will show under the disabled column and also in the dropdown box when selecting a user to add to the entity.
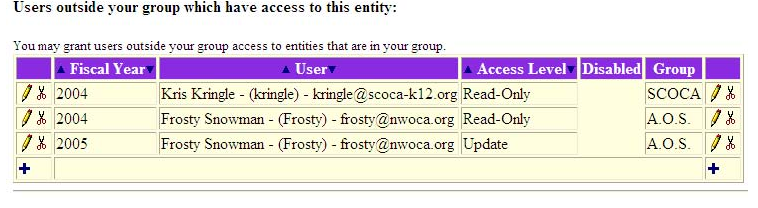
A third grid will be at the bottom of the screen:
This is where you can assign users outside of your ITC access to the entity. This grid primarily consists of AOS users and independent firms that deal with entities across the state. They are not restricted to working with entities from a particular ITC. Users assigned to group AOS appear in this selection box. This is the only place you can add users to an entity that are outside your group. Please check here first before adding a user to the system.