IMPORTANT NOTE
Before creating a new user account, please read this section carefully.
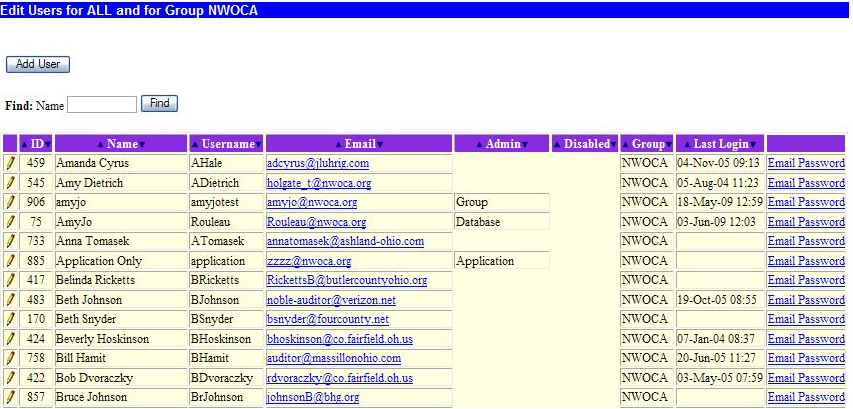
Use the Find option to search for the name of the person you are about to add. This option will look to see if the user exists within your group (example - NWOCA). If you do not find the person here, please click on the Maintain Entities link and select the entity you are going to add this person to. Once there, go to the grid on the bottom of the page and look for the user in the grid labeled "Users outside your group that have access to this entity". This is where anyone with a group other than yours (example - AOS) would be found.
Current Entity: Web-GAAP Training School District - 2006
Note: Before adding a new user, make sure they do not already have a Web-GAAP account. You can use the Find option to search for an existing user. Enter the first initial or the entire name and click Find.
IMPORTANT NOTE
It is very important that each user have his or her own Web-GAAP account. There should be absolutely no account sharing. Each account is for a specific person. Do not create general "auditor" accounts as done in other software. If the user will also need access to entities outside your group, please send mail to gaap@mcoecn.org and the Web-GAAP Support Team will create the user account and notify you when it is available.
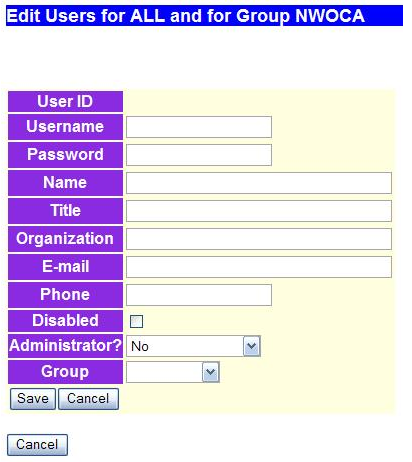
Click Add User to add a new user to the Web-GAAP system. You will see the following screen:
You will need to enter information in the following required fields:
Username - The naming convention to use is first initial and last name of the new user. Incorporate middle initial if necessary.
Password - assign a temporary password.
Name - User's first and last name.
Title - User's position, field is not required.
Organization - The name of the organization the user works for. This is not required.
Email - The user's email address. This is used to send them their temporary password.
Phone - The user's phone number.
Disabled check box is used to disable a username from the system. Users are not deleted from Web-GAAP, they can be disable or enabled with this option.
Administrator - Assign the type of access the user will have to the system.
New Feature - the Administrator drop down box now includes a "Treasurer" option. Use this when assigning access to treasurers. This will allow them to see all users who have access to their entity and gives them the ability to remove users from having access to the entity.
See Maintain Who has Access to Your Entity - Treasurer option only, from the Setup menu for further information.
Here is an example of a successfully added user:
Once you've successfully added a new user to the system you will be returned to the Maintain Users and Access Control page displayed above. Locate the user you just added and click on Email Password. This will send a message to the user notifying them of their newly created account and their temporary password. It also tells them that they will need to change their password when they login to Web-GAAP the first time. A message will appear telling you "Username and password sent to User ID ###". The user can later edit their account and modify their profile.
Granting access to entities. This process has two separate tables. The first table allows you to grant access to an entities fiscal year for a particular user.
Entity & Fiscal Year - drop down of entities and their fiscal years assigned to your ITC
Access Level - drop down of Read-Only and Update that user should have to Entity Fiscal Year - read-only is the default.
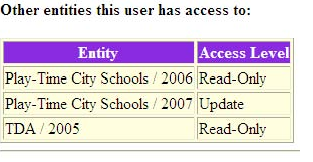
The second table is a listing of other entities fiscal years the user has access to.


