Generic Journal Entries
The Generic option illustrates the process of adding a new journal entry, or modifying or deleting a current journal entry.
These processes are identical for the following journals:
This process will use the Modified Accrual Journal Entry as an example. First select a fund for the journal entry. For example, 001-0000.
Note: The options listed for the transaction type determine which column on the corresponding trial balance the entry will appear. Click on the triangle pointed down to get a list of the types of transactions. A transaction type must be selected to properly direct the entry.
Adding a Journal Entry
Click on the Add Entry button. A box similar to the following will appear:
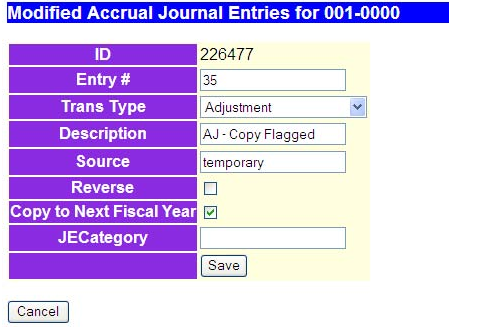
Data Fields:
- Entry # (Num) - Transaction number assigned by the upload program, system or the user. If you choose to leave this field blank the system will assign the next available number.
- Transaction Type - The type determines the column on the trial balance for that entry.
- Description - General description of the transaction.
- Source - Source of the transaction - import, work paper reference, manual entry, auditor, etc.
- Reverse - Check the box if this entry is to be reversed the following year and leave it blank if it is not.
- JECategory - This optional field allows the user to enter up to 4 characters to help sort journal entries when generating journal entry reports.
- Copy to Next Fiscal Year - Check this box if you would like this entry to be copied over to the next fiscal year with 0 balances. This flag is available in the modified accrual, governmental restricted net assets, program revenue, full accrual, governmental consolidation, general capital assets, and general debt consolidation journals. When the next fiscal year is opened, the entries that were flagged to copy to next year will be created in the appropriate journal and fund (if applicable), with all the accounts used in the copied entry but with all zero amounts. The user will then be able to edit those copied entries to fill in the amounts and make any other needed changes. This should speed up data entry for “standard” entries.
Note: The check box to Reverse may not appear on some types of Journals. You should enter data for the Entry #, unless you allow the system to assign it, Transaction Type, Description, and Source. Then click on the SAVE button in the heading. Screens such as the following will appear:
Note: that there are 2 lines, since there will have to be at least one debit and one credit. The account lookup field precedes the account drop down selection box. If you happen to know part or all of the account number you can enter it in the box to narrow the search field in the account drop down selection box. This will eliminate having to scroll through all of the account codes to find the one you'd like to select. You can also enter the account description here to find the account you'd like to select.
For example, if you type 2.02 in the account lookup field the first account in the selection box will be 2.04.000-REVENUES:(*). Now you don't have to scroll past all of the 1.**.*** account codes. To continue adding this new entry, select one of the Account fields and click on the down arrow. This will bring up a box containing a list of accounts. These accounts are GAAP/GASB 34 internal accounts with their own set of account numbers such as the following:
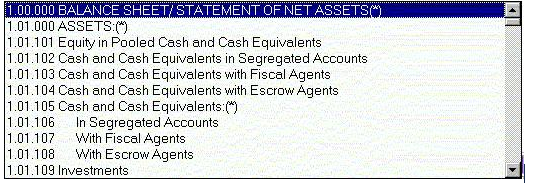
NOTE: The accounts that have an "*" at the end of the description are actually heading accounts and are not used to enter against. These accounts are displayed in the drop down box with the actual accounts so that the user can see the account structure and decide which account they want to select.
Now enter the account to be used, such as "1.01.125 Intergovernmental Receivable" and a DB or CR amount. Repeat this for the second entry line. You may re-enter different values for the Debit and/or Credit. Clicking the Reset button will return the entry to a previous value.
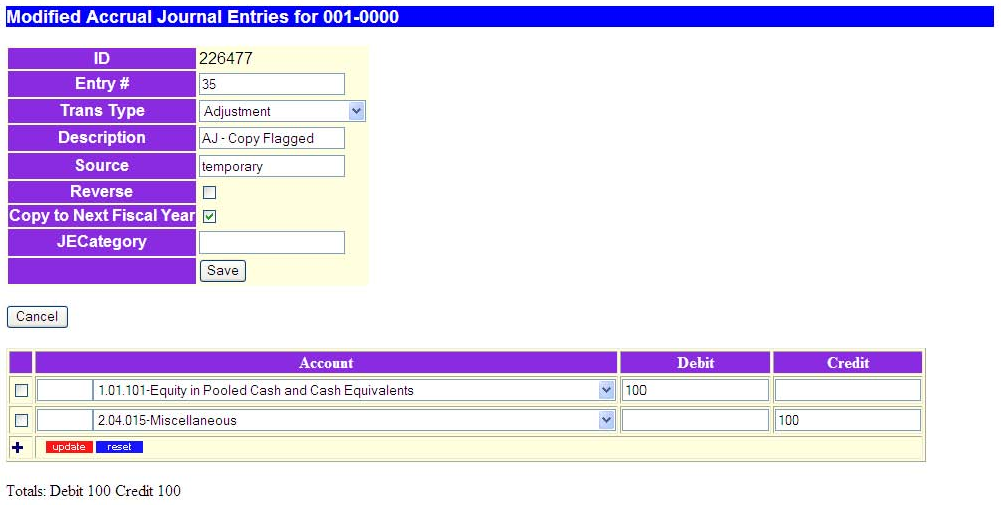
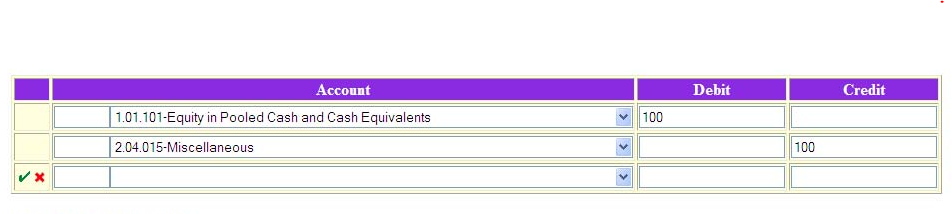
Next click on the Update button to enter these. The transactions entered now look like the following:

Click on the "+" button to add more entries and the following box will appear:

Enter another entry and click on the green check mark to save. You can continue entering entries until the total debits and credits are equal.
Clicking on the "+" button allows you to add more entries.
Clicking on the red "X" button will delete an entry.
In this case, our debit and credit totals already equal, so click on the red "X" to remove this extra line.
Note: If you click on the small square at the beginning of a line, a check mark will appear. This allows you to select that line. Once the line is selected you can click on "update" to delete the line.
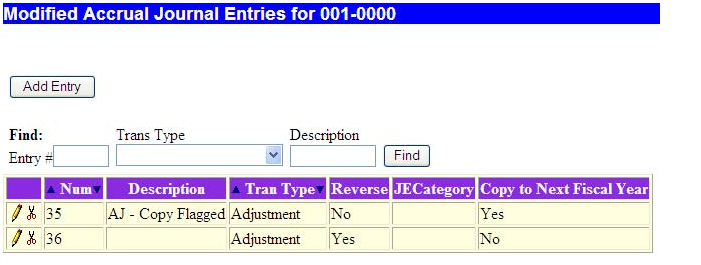
Click on the SAVE button in the heading to return to the beginning of the journal entry screen, which looks similar to the following:
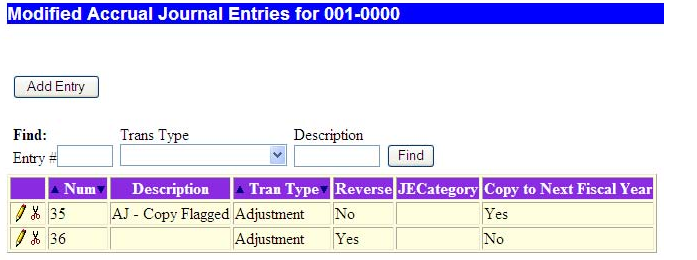
Note: Clicking on the pencil icon allows you to modify a journal entry. Clicking on the scissors icon allows you to delete an entry.
Modifying a Journal Entry
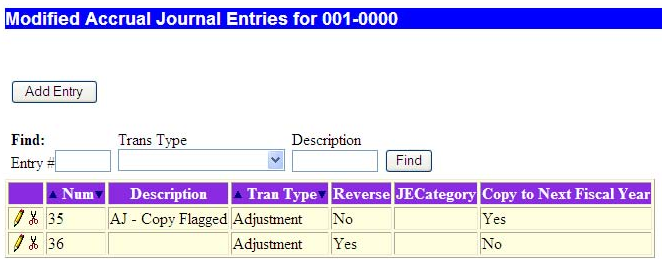
Use the Find option to locate the desired journal entry and bring it to the beginning of the list. It should look similar to the following:
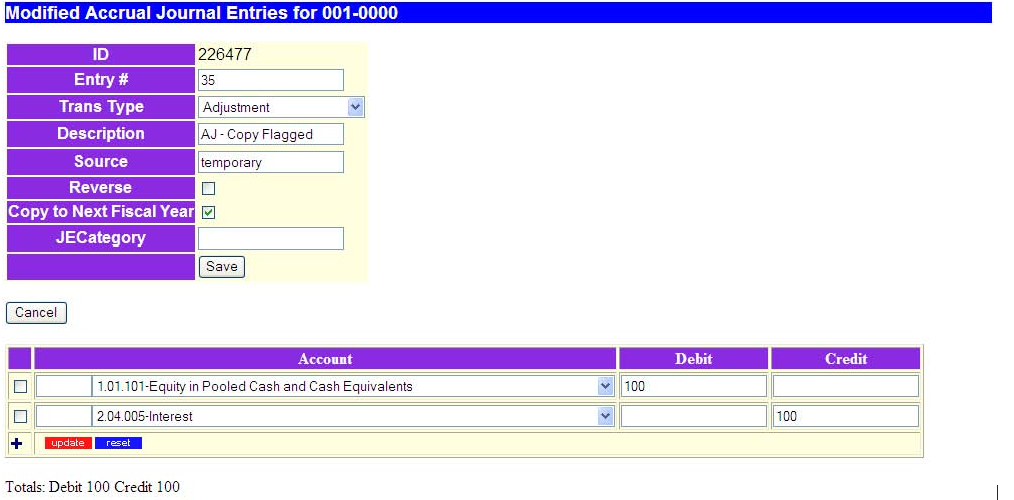
Click on the pencil icon to open the entry. For example, use entry #35. It should look like the following:

Now make the desired changes on any of the lines. For example, for line #2 change the account to "Interest". Select the new account and then click on the update button to save the results. The following screen appears:

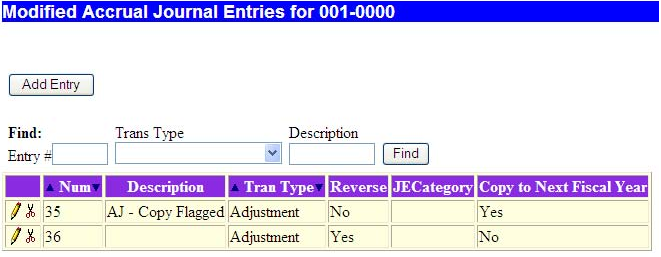
Now click on the SAVE button in the heading to return to the beginning of the journal entry screen, which looks similar to the following:
Deleting an Journal Entry
To delete an entire entry or a transaction line, click on the scissors icon. You will be asked to validate your choice. "Are you sure you want to delete this Entry?" Clicking "OK" will delete the entry. Clicking "Cancel" will cancel the deletion.